【AWS Code シリーズ】AWS CodeCommit の運用方法を考えてみた
皆様、AWS CodeCommit は使っていますか??
CodeCommit はアプリケーションのコード管理が便利になる、AWS 上のプライベートでマネージドな Git リポジトリサービスですが、今回は CodeCommit を運用の観点でご紹介したいと思います。
CodeCommit の運用で重要なテーマとなるのが、適切で安全なリポジトリ管理です。
本ブログではその方法論の一例を解説します。
目次
AWS CodeCommit ユーザーの役割について考える
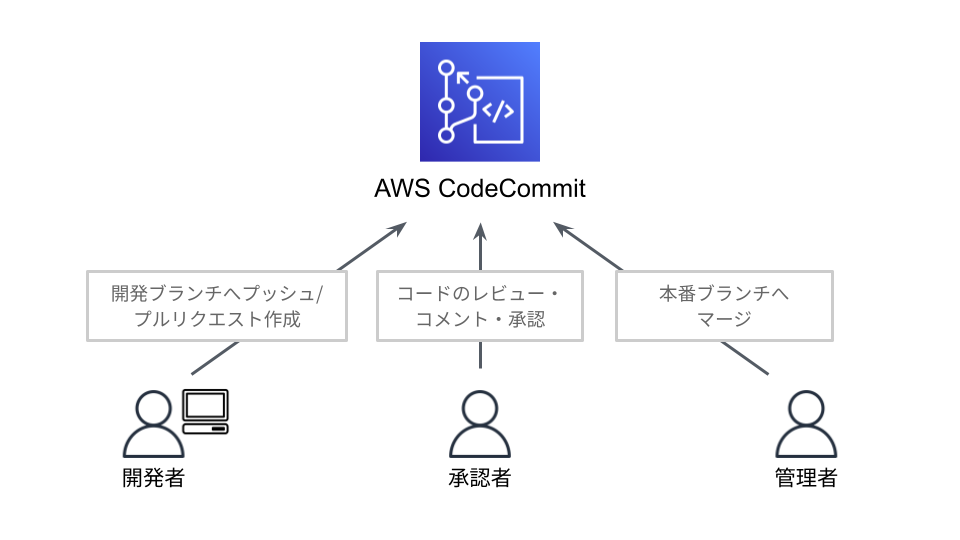
今回は、CodeCommit(あるいは Git)ユーザーを以下のような役割に分けて考えてみます。
また、権限として以下を想定しています。
※もちろん実際は、より細かく役割や権限を分けることもあるかと思います!
開発者
- アプリケーションコードの更新(追加・修正・削除)やプルリクエストを行う役割
- 他開発者のアプリケーションコードの更新についてコメントし合ったりできる
- Git プッシュや Git プルもできる
- 本番(main)ブランチからはプルのみで他のアクションはできない
- 担当のリポジトリのみ権限がある
承認者
- プルリクエストの承認を行う役割
- それだけだとユーザー数を消費するのが勿体ないので開発者も担う
- 担当のリポジトリのみ権限がある
管理者
- プルリクエストに対してマージを行う役割
- プルリクエストにコメントしたりマージしたり閉じたりする権限がある
- CodeCommit に関するフル権限をもつ
AWS CodeCommit を利用した開発フローを考える
開発者は本番コードが配置されているブランチにアクセスしコードを取得する必要がありますが、それ以外のアクションはできないようにしたいですよね。そのため、開発は以下のようなフローにしてみます。
※下記は Git を用いたローカル PC での操作を記載していますが、AWS コンソールだけでも可能です
① アプリケーションコードを本番ブランチからローカル PC にプル
② ローカルPCにて別ブランチ(仮に開発とします)作成
③ 開発ブランチにスイッチしてコード変更
④ 開発ブランチを CodeCommit へプッシュ
⑤ 開発ブランチのプルリクエスト作成
⑥ 承認者による承認
⑦ 管理者によるマージ実行
以下が開発フローのイメージ図になります。
<イメージ図>
では早速やっていきましょう!
AWS CodeCommit 用に開発フローを整える
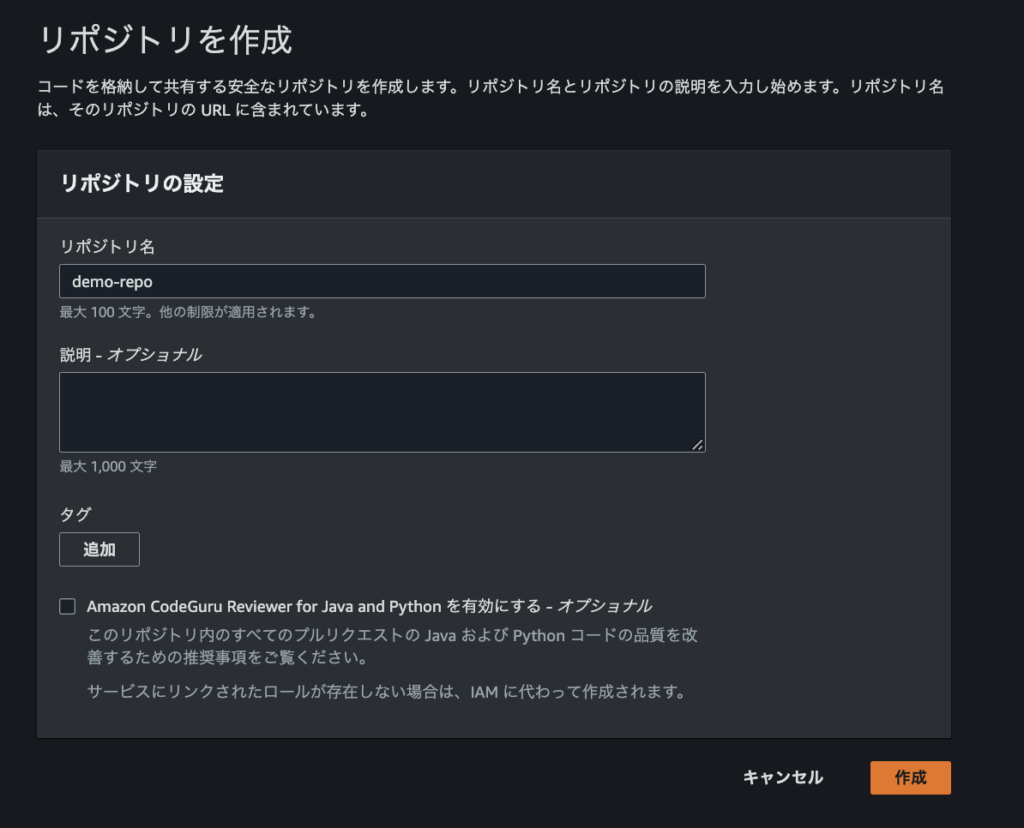
1. リポジトリ作成
まずはアプリケーションコードを保存する器となるリポジトリを CodeCommit 内に作成していきます。今回はリポジトリを2つ作成し、開発者が割り当てられたリポジトリのみにアクセスできることを確認します。
AWS の管理者権限をもつ IAM で作業をしてください。
CodeCommit コンソール画面で[demo-repo]と[demo-repo2]を作成します。
作成できました。

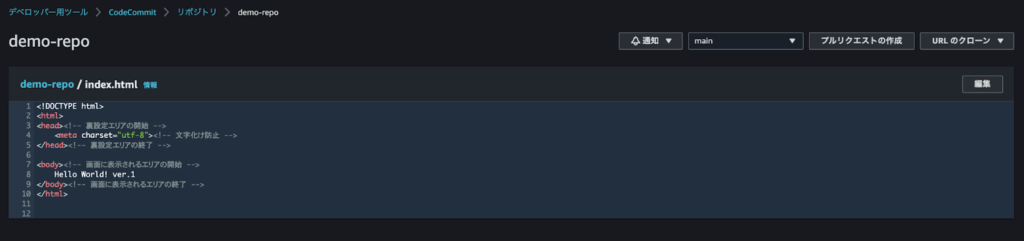
今回は試しに、リポジトリに適当な HTML ファイルをアップロードしてみます。

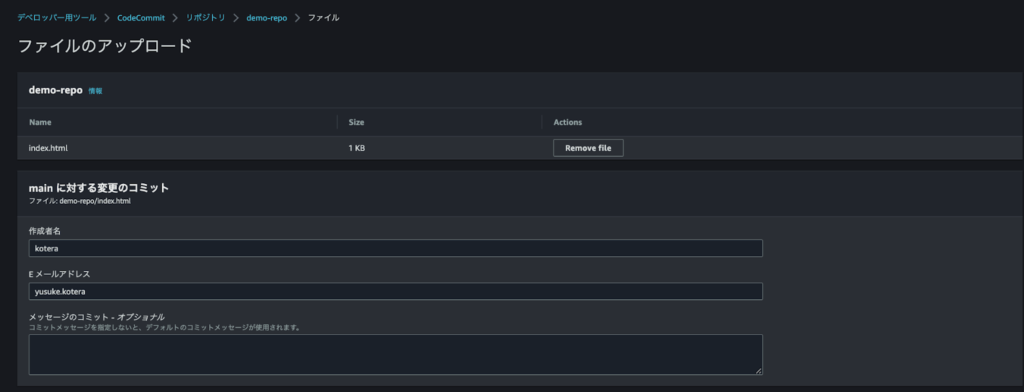
アップロードできました!
2. IAM ユーザー用のポリシー作成
今回作成するユーザーは開発者、承認者、管理者の3名分になります。
それぞれ必要な権限を付与するための IAM ポリシーから作成していきます。JSON のみ記載しますので、ポリシーの作成方法は公式ドキュメントをご参照ください。
IAM ポリシーの作成 (コンソール) | AWS Identity and Access Management
開発者のポリシーは以下です。
ポリシー名は「DemoCodecommitPolicy」としておきます。
{
    "Version": "2012-10-17",
    "Statement": [
        {
            "Sid": "VisualEditor0",
            "Effect": "Allow",
            "Action": [
                "codecommit:Get*",
                "codecommit:List*",
                "codecommit:*Comment*",
                "codecommit:BatchGet*",
                "codecommit:CreateBranch",
                "codecommit:PutFile",
                "codecommit:CreateCommit",
                "codecommit:CreatePullRequest",
                "codecommit:DescribeMergeConflicts",
                "codecommit:DescribePullRequestEvents",
                "codecommit:BatchDescribeMergeConflicts",
                "codecommit:GitPull",
                "codecommit:GitPush",
                "codecommit:CancelUploadArchive",
                "codecommit:EvaluatePullRequestApprovalRules",
                "codecommit:DeleteFile"
                ],
            "Resource": "arn:aws:codecommit:ap-northeast-1:<account_id>:demo-repo"
        },
        {
            "Sid": "VisualEditor1",
            "Effect": "Allow",
            "Action": "codecommit:ListRepositories",
            "Resource": "*"
        },
        {
            "Sid": "VisualEditor2",
            "Effect": "Deny",
            "Action": [
                "codecommit:MergeBranchesByFastForward",
                "codecommit:MergeBranchesBySquash",
                "codecommit:MergePullRequestBySquash",
                "codecommit:MergePullRequestByThreeWay",
                "codecommit:MergeBranchesByThreeWay",
                "codecommit:MergePullRequestByFastForward",
                "codecommit:PutFile",
                "codecommit:GitPush",
                "codecommit:DeleteBranch"
            ],
            "Resource": "arn:aws:codecommit:*:*:*",
            "Condition": {
                "Null": {
                    "codecommit:References": "false"
                },
                "StringEqualsIfExists": {
                    "codecommit:References": [
                        "refs/heads/main",
                        "refs/heads/master"
                    ]
                }
            }
        }
    ]
}
※<account_id>は AWS アカウント ID を代入します。
肝となるのは[Deny]の節です。リソースでは全リポジトリを指定し、"codecommit:References" では main または master ブランチ(本番コード格納場所)に対してはマージ・プッシュ・ファイル配置などが一切できないようになっています。
次は承認者です。
ポリシー名は「DemoCodeCommitApprovePolicy」としておきます。
開発者の権限にプルリクエストを承認する権限を追加します。
{
    "Version": "2012-10-17",
    "Statement": [
        {
            "Sid": "VisualEditor0",
            "Effect": "Allow",
            "Action": [
                "codecommit:Get*",
                "codecommit:List*",
                "codecommit:BatchGet*",
                "codecommit:*Comment*",
                "codecommit:CreateBranch",
                "codecommit:GitPull",
                "codecommit:PutFile",
                "codecommit:CancelUploadArchive",
                "codecommit:CreateCommit",
                "codecommit:DescribeMergeConflicts",
                "codecommit:BatchDescribeMergeConflicts",
                "codecommit:EvaluatePullRequestApprovalRules",
                "codecommit:DescribePullRequestEvents",
                "codecommit:CreatePullRequest",
                "codecommit:GitPush",
                "codecommit:DeleteFile",
                "codecommit:UpdatePullRequestApprovalState"
            ],
            "Resource": "arn:aws:codecommit:ap-northeast-1:<account_id>:demo-repo"
        },
        {
            "Sid": "VisualEditor1",
            "Effect": "Allow",
            "Action": [
                "codecommit:ListRepositoriesForApprovalRuleTemplate",
                "codecommit:ListApprovalRuleTemplates",
                "codecommit:ListRepositories"
            ],
            "Resource": "*"
        },
        {
            "Sid": "VisualEditor2",
            "Effect": "Deny",
            "Action": [
                "codecommit:MergeBranchesByFastForward",
                "codecommit:MergeBranchesBySquash",
                "codecommit:MergePullRequestBySquash",
                "codecommit:MergePullRequestByThreeWay",
                "codecommit:MergeBranchesByThreeWay",
                "codecommit:MergePullRequestByFastForward",
                "codecommit:PutFile",
                "codecommit:GitPush",
                "codecommit:DeleteBranch"
            ],
            "Resource": "arn:aws:codecommit:*:*:*",
            "Condition": {
                "Null": {
                    "codecommit:References": "false"
                },
                "StringEqualsIfExists": {
                    "codecommit:References": [
                        "refs/heads/main",
                        "refs/heads/master"
                    ]
                }
            }
        }
    ]
}
開発者の権限にプルリクエストを承認する権限を追加します。
"codecommit:UpdatePullRequestApprovalState"
最後に管理者の権限です。
管理者は作成せず、以下の AWS 管理ポリシーを利用します。
ポリシー名: AWSCodeCommitFullAccess
一番シンプルですね!強力な権限なので取り扱い注意です。
3. IAM ユーザー作成& Git 認証情報生成
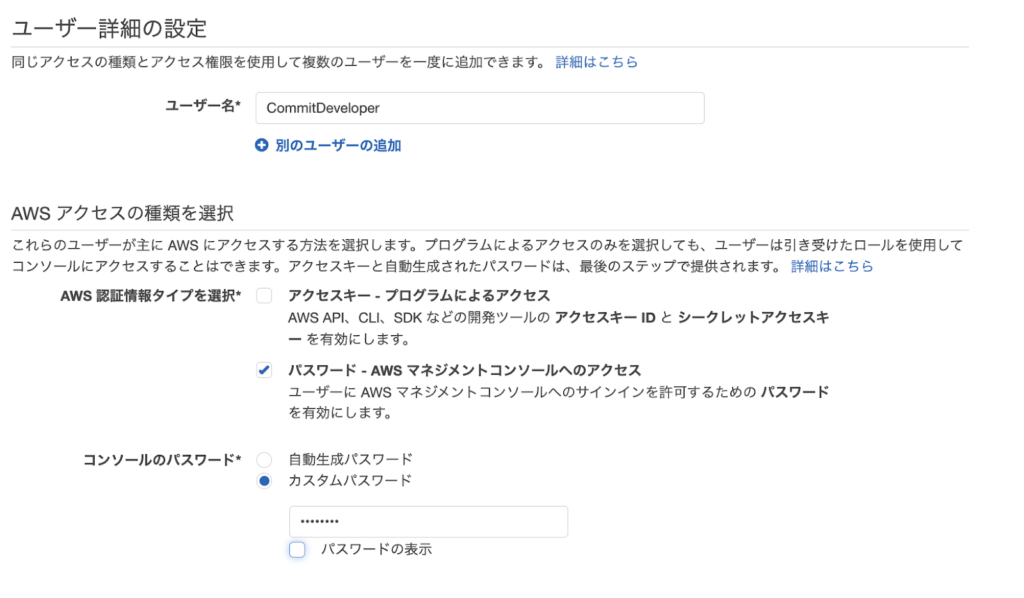
開発者・承認者・管理者用のポリシーが完成したので、紐付ける IAM ユーザーを1ユーザーずつ作成していきます。サンプル画面は開発者用の IAM ユーザー作成時のものですが、他のユーザーについても同じように繰り返してください。
ユーザーの作成手順は以下の URL をご参照ください。
IAM ユーザーの作成(コンソール) | AWS Identity and Access Management
※ある程度グルーピングが可能なら IAM ユーザーをグループに紐付けるのもありです!
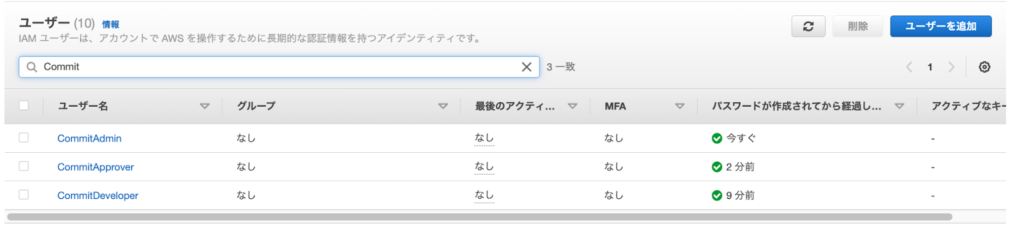
[ユーザー名]は以下のようにしています。
- 開発者:CommitDeveloper
- 承認者:CommitApprover
- 管理者:CommitAdmin
全ユーザーともにコンソールは使うので、[パスワード]にチェックを付けます。
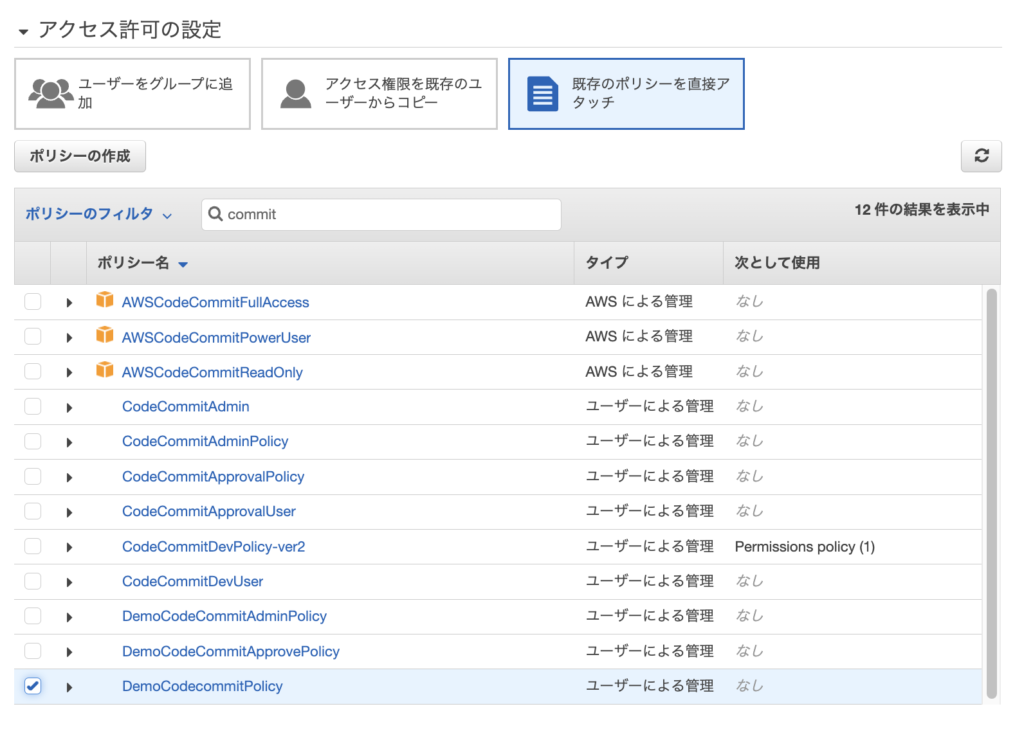
「既存のポリシーを直接アタッチ」を選択し、各ユーザーにポリシーを適用します。
- CommitDeveloper:DemoCodecommitPolicy
- CommitApprover:DemoCodeCommitApprovePolicy
- CommitAdmin:AWSCodeCommitFullAccess
作成しました!
最後に各ユーザーで Git アクセス用の認証情報を生成しておきます。
ユーザー名をクリックします。

ユーザー詳細画面で[認証情報]タブをクリックし、[AWS CodeCommit の HTTPS Git 認証情報]欄の[認証情報生成]をクリックします。
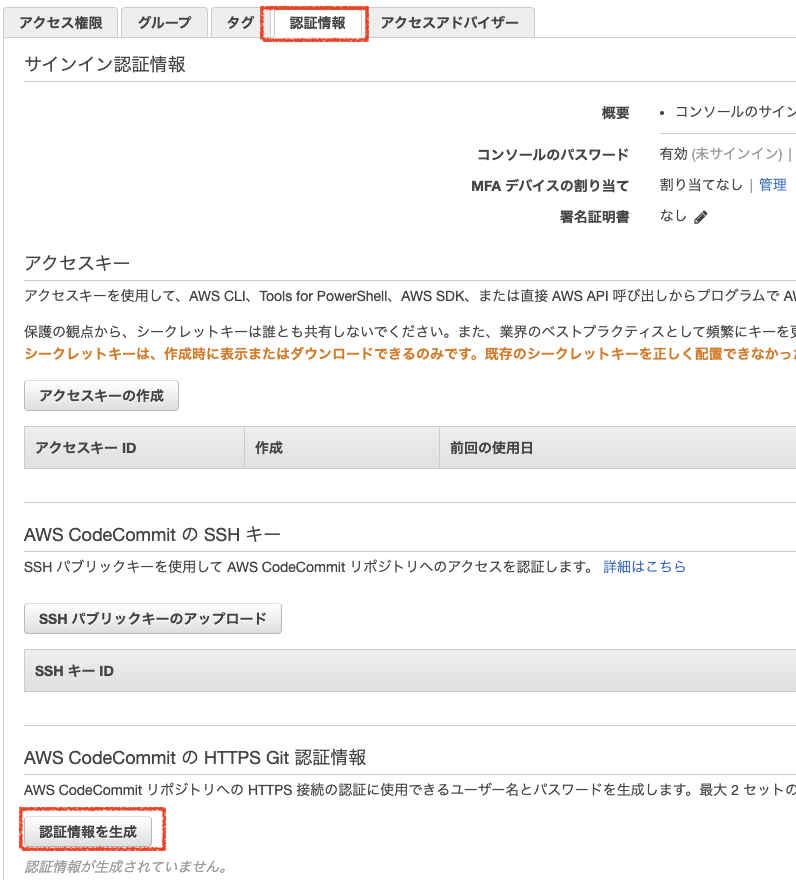
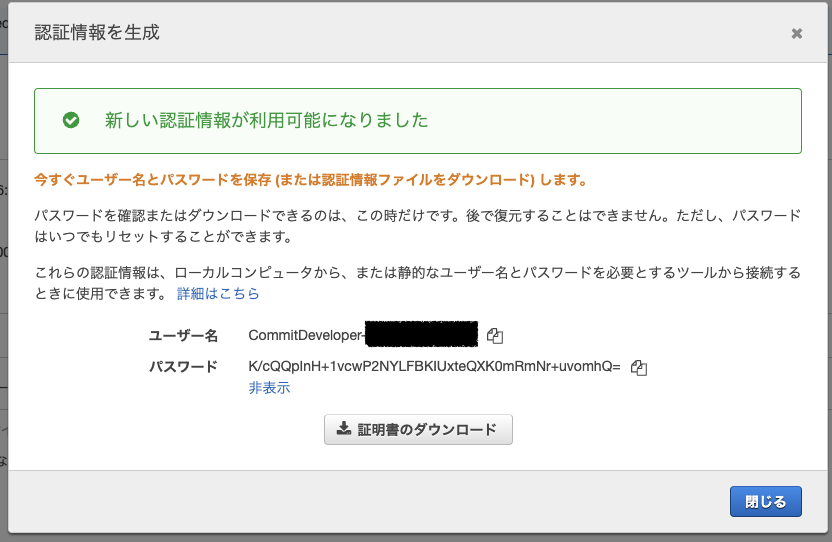
ポップアップが表示されますので、ユーザー名とパスワードをメモしておきます。
この時にしか表示されないのでご注意を!
4. ローカル PC に Git クローン
既に Git プログラムをインストールしているものとします。
まだの方は下記 URL にアクセスして、ダウンロードとインストールをお願いします。
URL:https://git-scm.com/downloads
それではローカル PC に CodeCommit の Git リポジトリをクローンしていきます!
私は Windows 10 端末にて実施しています。
Powershell でコマンド実行していきますが、
① temp フォルダを作成
② 作成したフォルダまで移動
③ クローンコマンド実行
までしています。
PS C:\> mkdir temp

    ディレクトリ: C:\

Mode                 LastWriteTime         Length Name
----                 -------------         ------ ----
d-----        2022/11/04     22:10                temp

PS C:\>
PS C:\> cd temp
PS C:\temp> ls
PS C:\temp>
PS C:\temp> git clone
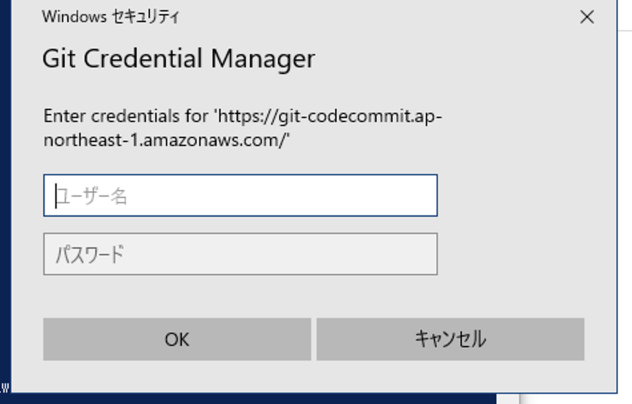
git clone 実行時に以下のポップアップが表示されますので、「IAM ユーザー作成& Git 認証情報生成」で生成した Git 認証情報を入力します。
temp フォルダの下に[demo-repo]が表示されています。
クローンが無事完了しました!
https://git-codecommit.ap-northeast-1.amazonaws.com/v1/repos/demo-repo
Cloning into 'demo-repo'...
warning: You appear to have cloned an empty repository.
PS C:\temp> ls


    ディレクトリ: C:\temp


Mode                 LastWriteTime         Length Name
----                 -------------         ------ ----
d-----        2022/11/04     22:16                demo-repo
権限を持っていない[demo-repo2]をクローンしようとすると、403エラーになりました。
ちゃんと制限が効いています。
PS C:\temp> git clone https://git-codecommit.ap-northeast-1.amazonaws.com/v1/repos/demo-repo2
Cloning into 'demo-repo2'...
fatal: unable to access 'https://git-codecommit.ap-northeast-1.amazonaws.com/v1/repos/demo-repo2/': The requested URL returned error: 403
5. 承認ルールテンプレート設定
承認者が承認して初めて管理者がマージができるように設定します。
CodeCommit コンソールから[承認ルールテンプレート]をクリックし、
[テンプレートを作成]をクリックします

以下のように入力します。
- 承認ルールテンプレート名:demo-rule
- 必要な承認の数:1
- 承認者のタイプ:IAMユーザー名または引き受けたロール
- 値:CommitApprover
- 関連付けられたリポジトリ:demo-repo
AWS CodeCommit での開発フローを実践してみる
開発ブランチ作成〜 Git プッシュまで以下の順で操作をしていきます。
① 開発者ユーザーで開発ブランチ作成し、ファイル編集して CodeCommit にプッシュ
② 承認者ユーザーでプルリクエスト確認・コメント・承認
③ 管理者ユーザーにて本番ブランチへマージ
① 開発者ユーザーで開発ブランチ作成し、ファイル編集して CodeCommit にプッシュ
まずはローカル PC に開発ブランチを作成します。
git branch コマンドでブランチが作成できているかと、開発ブランチにスイッチできているかを確認しています。
PS C:\temp\demo-repo> git branch
* main
PS C:\temp\demo-repo> git checkout -b dev
Switched to a new branch 'dev'
PS C:\temp\demo-repo> git branch
* dev
  main
PS C:\temp\demo-repo>
ちゃんと開発ブランチの作成とスイッチができていますね。
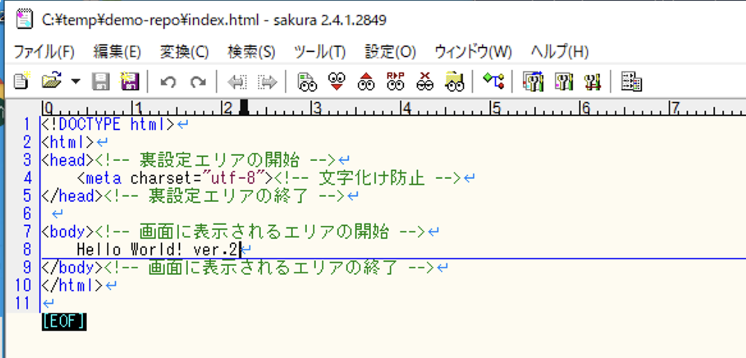
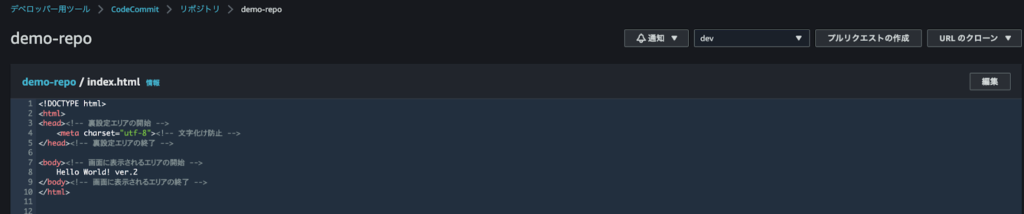
それではファイルを編集して CodeCommit にプッシュします。
ファイル編集は GUI で実施しました(Powershell だと日本語が文字化けして見えにくいため・・・)。
“ver.1” → “ver.2” に変更しました。
次にプッシュします。
dev ブランチが CodeCommit に作成されていそうです。
PS C:\temp\demo-repo> git commit -m "second version"
[dev 5052e6e] second version
 1 file changed, 1 insertion(+), 1 deletion(-)
PS C:\temp\demo-repo>
PS C:\temp\demo-repo> git push --set-upstream origin dev
Enumerating objects: 5, done.
Counting objects: 100% (5/5), done.
Delta compression using up to 4 threads
Compressing objects: 100% (2/2), done.
Writing objects: 100% (3/3), 279 bytes | 279.00 KiB/s, done.
Total 3 (delta 1), reused 0 (delta 0), pack-reused 0
To https://git-codecommit.ap-northeast-1.amazonaws.com/v1/repos/demo-repo
   b37bacd..5052e6e  dev -> dev
branch 'dev' set up to track 'origin/dev'.
PS C:\temp\demo-repo>
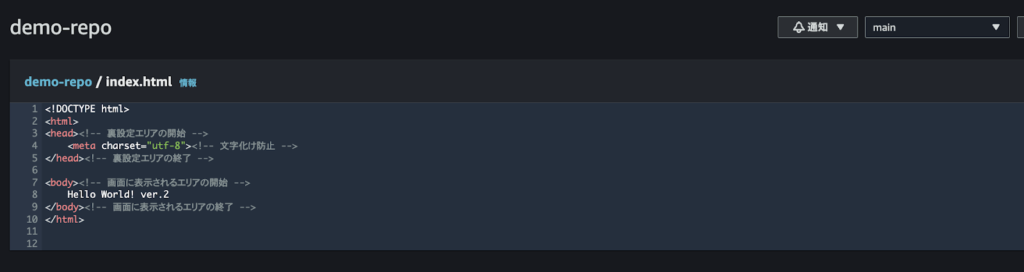
確認するとできていました!“ver.2”になっていることも確認できます。
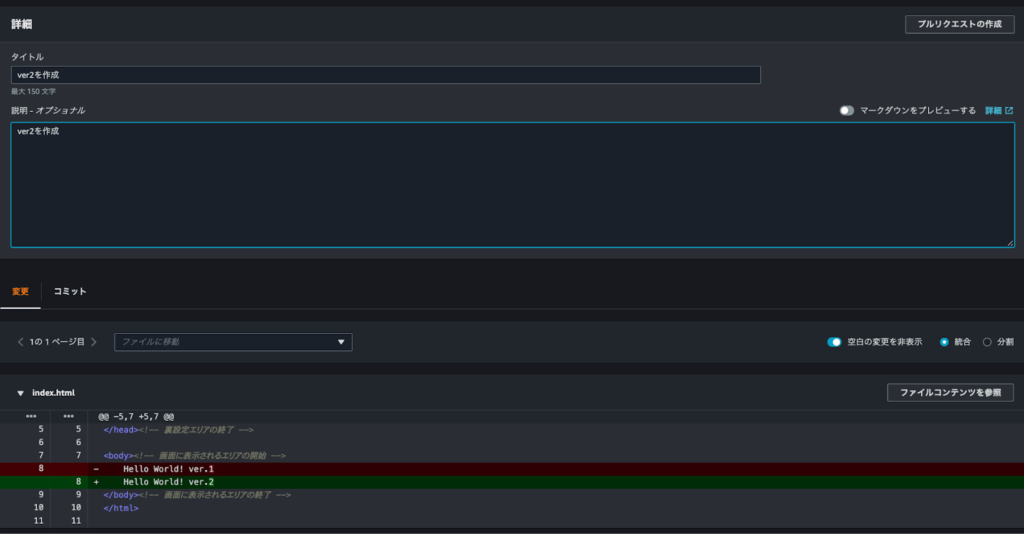
では[プルリクエストの作成]をクリックして、承認者にフローを回します。
② 承認者ユーザーでプルリクエスト確認・コメント・承認
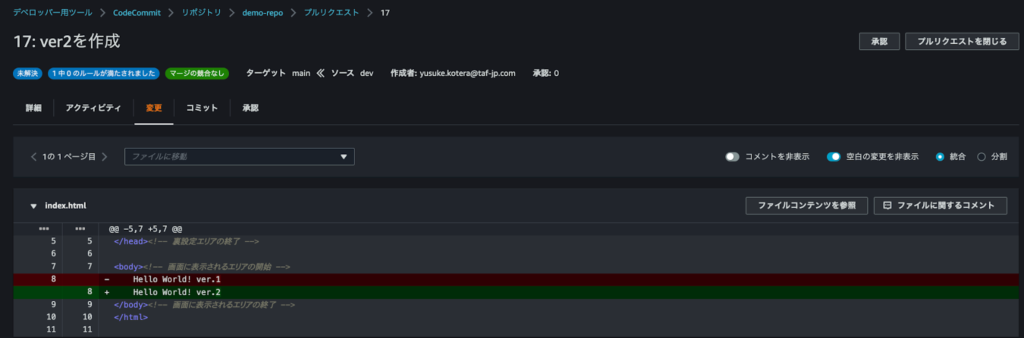
プルリクエストが確認できました!
[承認ステータス]でルールが満たされていないことが確認できます。

コメントも投稿できます。

承認ルールが満たされない状態で、管理者ユーザーにてマージができるか確認しましたが、そもそも選択肢すら出てきませんでした(通常は右上に表示されます)。
ではさっさと承認しちゃいます。[承認]をクリックします。
承認後に[マージ]の選択肢が出てきました。
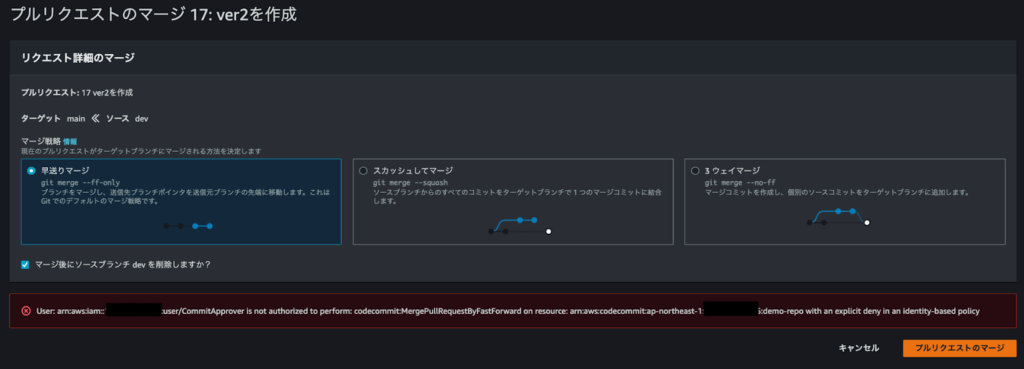
承認者ユーザーなのでマージができないはずです。[マージ]をクリックしてみます。
ちゃんとエラーが表示されマージできませんでした。よかったです。
③ 管理者ユーザーにて本番ブランチへマージ
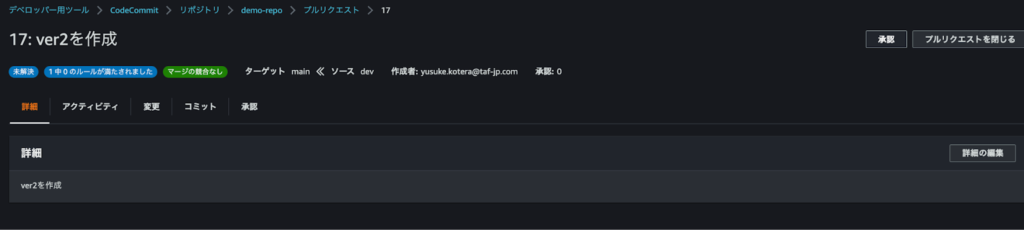
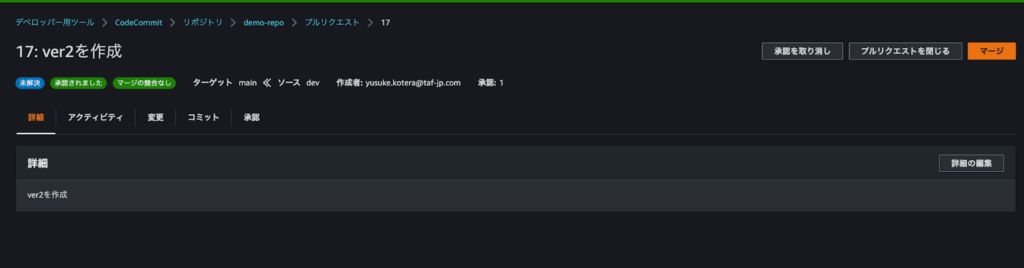
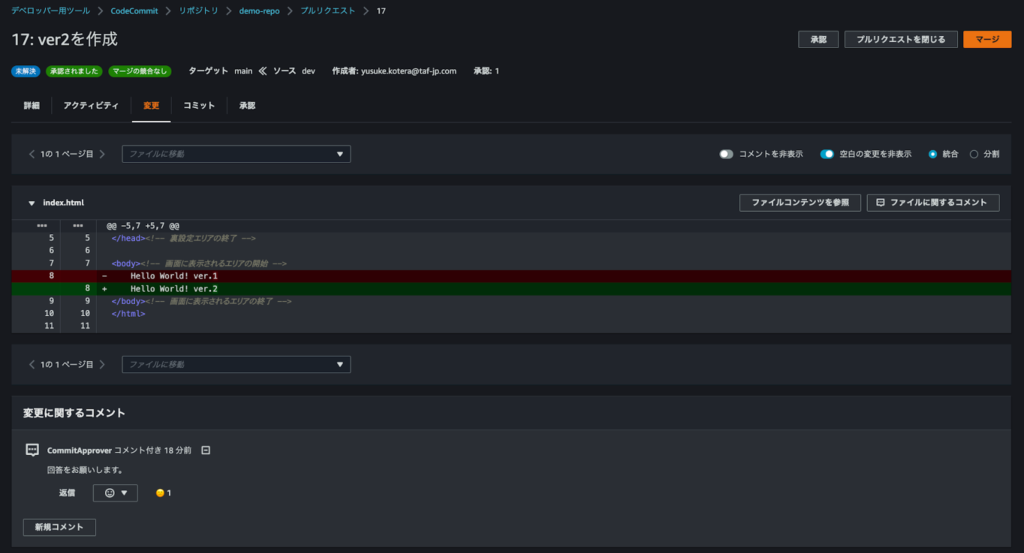
管理者ユーザーでログインし直し、プルリクエストの状態を見てみると、承認ルールの条件が満たされて[承認ステータス]が「承認されました」と表示されていることがわかります。

では変更内容と承認者のコメントをチェックした上でマージしましょう。
[マージ]をクリックします。
マージ方法と開発ブランチ(dev)を削除するかのフラグが選べます。
今回はデフォルトのままにして[プルリクエストのマージ]をクリックします。
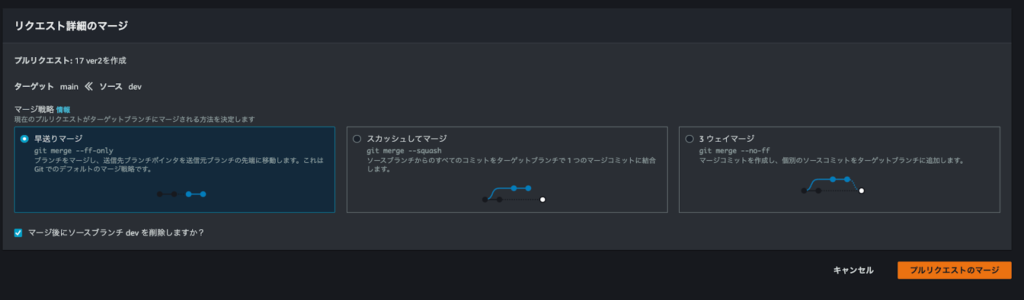
ステータスがマージ済みとなりました。

本番ブランチ(main)のコードも“ver.2”になっています!
AWS CodeCommit をその他サービスと組み合わせより便利に!(まとめ)
ご紹介した運用は一例ですが、IAM や CodeCommit の機能で安全で安心なリポジトリ管理が実現できることが分かっていただけたかと思います!
なお、CodeCommit は単体でも便利なサービスですが、CodeBuild や CodeDeploy、 CodePipline サービスと組み合わせることで、Amazon EC2、AWS Lambda、Amazon ECS などの AWS サービスだけでなく、オンプレサーバのアプリケーションコードの管理からデプロイまでを一元管理して品質を保持し、開発プロセスを自動化することが可能です。
弊社では、上記の Code シリーズを利用した開発プロセス自動化(CICD)の構築・運用サポートもご相談を承っておりますので、気になる方は、お気軽に お問い合わせフォーム からお問い合わせください。

元記事発行日: 2024年03月08日、最終更新日: 2024年11月27日